Thermistor Repair Kit for Dometic RM2612, RM2652, RM2812, RM2852 Refrigerator (OEM)
Repair Kit for Thermistor 2931863035
Dometic Refrigerator Repair Instructions using Articca RV Thermostat Kit
Instruction to repair Dometic refrigerators using and OEM Articca thermistor kit. This manual is for qualified service technicians and the Articca thermistor should not be installed except by professional service personnel of Dometic refrigerators or knowledgeable technicians familiar with electronic repair.
Articca is void of liability for incorrect installation of part and by installing this replacement thermistor the technician is acknowledging his duty and liability to follow all the instructions and warnings in this manual. Articca also does not warrant either the fix nor the hardware that is adjoined to the new thermistor fix.
For further disclaimers please read the Eula, installation means acceptance of the terms and conditions.
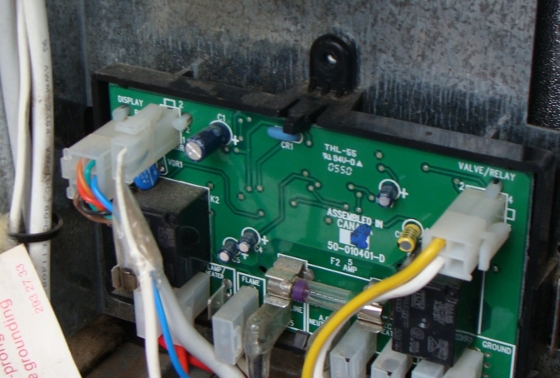
Step1. Disconnect the refrigerator controller board.
The two wire thermistor is connected to the controller board (usually through silkscreen labeled sensor).
Warning! This step is not only the first but most important at protecting the controller board while fixing the thermistor.
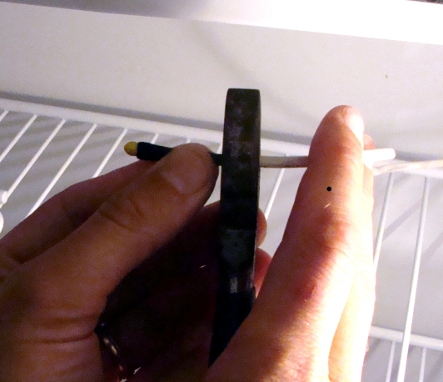
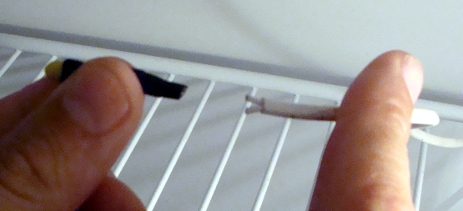
Step 2. Cut the old (damaged) thermistor tip from the wire.
After cutting the tip you will leave the wire intact which runs through the refrigerator out to the controller board.
|
|
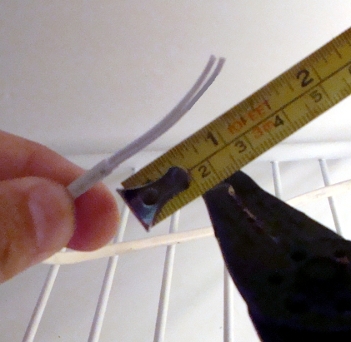
Step 3. Strip back the bundle insulation 1.5'' from the end of the wire.
Warning! Make sure that the two individual wires have undisturbed insulation after cutting back the bundling insulation. Otherwise the two wires could short out the thermistor and defeat the fix and possibly (very unlikely) cause damage to the controller board. Inspect the all sides of the remaining wire insulation.
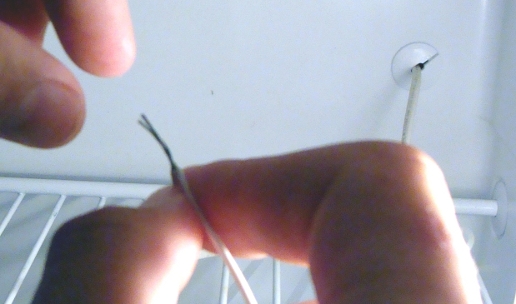
Step 4. Next strip the individual wires 0.5'' from the end of the wire.
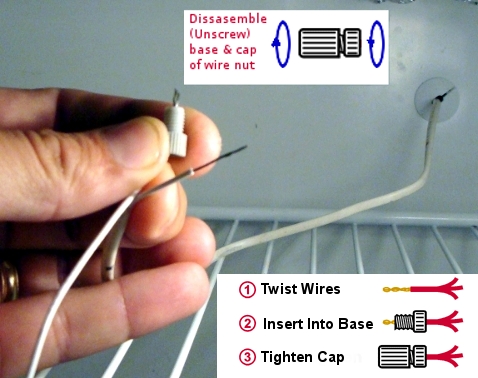
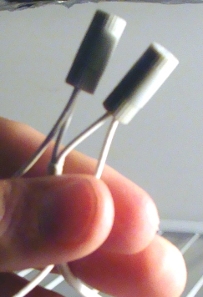
Step 5. Twist together the wires of the Articca sensor onto the bare wires of the provided thermistor OEM Articca replacement.
Note! The wires are not order dependent. Connection order of the wires does not matter.
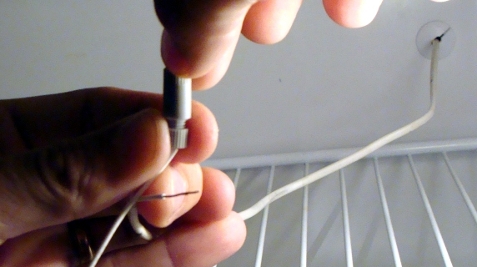
Step 6a. Place bottom of the wire nuts low enough to cover and protect all exposed conductor.
Step 6b. Screw on wire nut over protruding twisted wires.
Step 6c. Repeat wire nut installation on second set of twist together wires.
Warning! Inspect and reinspect all the wire nuts and wires and make sure that good insulation is maintained everywhere.
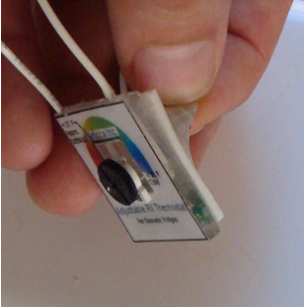
Step 7. Peel adhesive backing from the Articca thermistor.
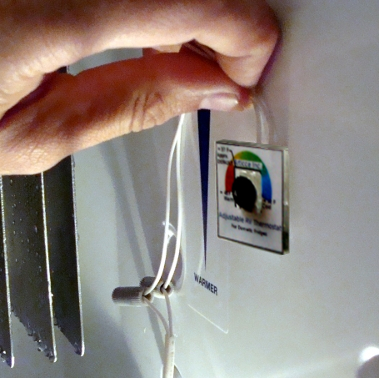
Step 8. Locate the position for the Articca thermistor. Place on side of the refrigerator compartment a 0.5-0.8 inches away from fins.
Step 9. Press the thermistor firmly with fingers until a good stick is obtained.
Note: It is important that the surface be dry and clean. Wiping condensate on the wall of the refrigerator with dry towel before applying the sticky thermistor is very important. Also, walk the fingers around the Thermistor front face several times to push the contact adhesive thoroughly on the refrigerator wall. Clear tape may be added to the wires as a strain relief and to keep away slack in the wires from interacting with food in the compartment.
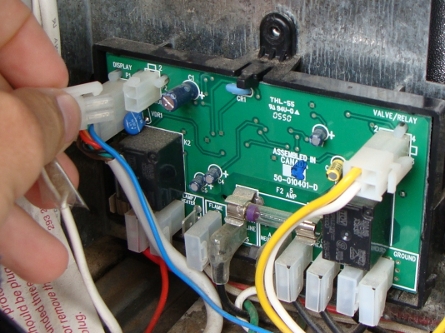
Step 10. Plug the sensor plug wires back into the controller board.
Step 11. Apply the cover and tighten screws.
Time to fix: Approximately 5 minutes to repair Dometic refrigerator using Articca thermistor tip.
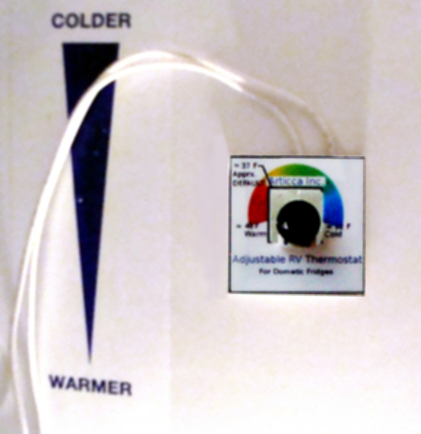
Time savings come in handy but using the thermistor replacement from Articca will also add value by allowing your customer to adjust the temperature settings inside their refrigerator. It is important to set the white arrow to 33 – 39 F for a first time setting (usually this is factory default). Also let the RV owner know that he has the ability to fine adjust his refrigerator temperature after your fix.